Friday, March 9, 2012
Cute Cat Pins
Hi all,
Mandy did the Indiana show and demonstrated jewelry. I don't know what they were most curious about at this show but I do know at the Atlanta show there was a lot of interest in Cleopatra, our cat jewel stamp. There were a few tips I was trying to get across, but did not have the proper sample set-up, so I made one to take with me to the next show. I'm sharing them today and hope they will be helpful for the cat and other related projects. I'll probably be doing a few more jewel blogs in the next few weeks. I want to excuse myself right now for my color choices. I'm such a earth tone person that it is really hard for me to deviate!
The following goes against the instructions we usually give for jewel instructions but most of our other jewelry projects do not have center areas that need cutting out and larger areas that don't call for crystals. So, here goes.......
Stamp and emboss your cat on one piece of smooth black cardstock, then stamp another image on another piece before gluing them together.
Cut away with exacto the area shown. If you glue them together first as we normally do it will be more difficult to cut.
Now glue the two pieces together, doubling the paper will make it stronger and more durable.
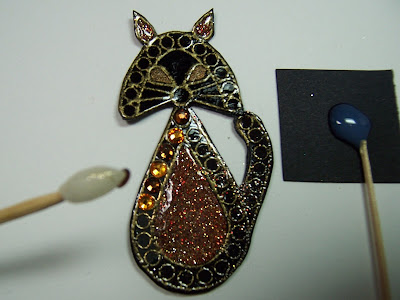
Paint your cat's belly. Paint the ears and eyes if desired, there's a lot of flexibility in creating the look of the cat. I used LuminArte Indian Copper and Bronze Medallion. You could stop here and build up the belly with a few layers of Crystal Lacquer.
We are going to give the belly a really great look by glittering it and putting Crystal Lacquer over it. I used a Quickie Glue Pen and Tree Bark Glitter from Art Institute. Both of these products we carry on on website.
Spread crystal lacquer over the entire project--front and back. This again, is to make it durable and to give a more finished look.
Cut the cat out. Add 1 or 2 more layers of crystal lacquer to the belly to give it dimension. This gives a very jewel like look. Hint.......brighter colors will look even better.
Add crystals in the usual manner by dabbing Crystal Lacquer in the openings for them and use our Pixie Pick-ups to transfer them. You probably can't tell on the photo, but I used 2 different colors of
crystals (Topaz and Smoked Topaz). This gives it a little more of an interesting appearance.
Now for a great new tip and a great addition of depth. The head was stamped again. Follow all the basic instructions. I'm now using a foam product to raise the head up. You can find the foam sheets in the kid's section of you local craft store. It goes by different names, but we'll just call it foam sheets. Stamp the cat head on it and cut it out. Glue to the back of the paper head and add it to the whole cat. This gives a nice finished edge. Previously we were using pieces of foam mounting tape which was white. The black fun foam really gives a nicer finished edge.
I think I've decided that I like the look of an actual eye. A number 5 black crystal was my choice this time. I also made one with pearl pens instead of crystals and I like the look, less glitzy, if that's a look you might prefer. I think enough is enough for this time! I have a couple more tips for next week, but won't make it quite so lengthy!
~Kathy
Subscribe to:
Post Comments (Atom)


This is one of my favorite stamps and I totally love how you designed this one. Using two crystal colors really enhances the overall effect!
ReplyDeleteI love this idea!!! Gorgeous and looks easy enough to do!!
ReplyDeleteWhat size crystals do I need for the nose, head, and body? Thanks!
ReplyDeleteSorry -- I found the info on the crystal sizes I need. I'm anxious to try this!
ReplyDeleteThis is very nicely done! This stamp is on my wish list! I want to do the pin in green!
ReplyDeleteLove it! Would love to have a doggy stamp in this style too!
ReplyDelete